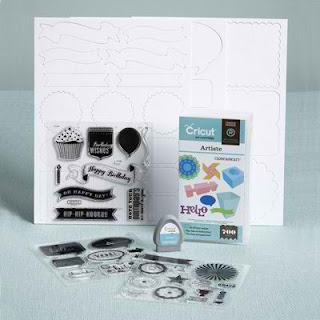
We're so excited to be doing this hop and we have a fabulous lineup with some very talented ladies. There will be lots of fun projects!!!
This month we will be showcasing a different page from the Artiste cartridge! Did you know there were 700 images on this cartridge?? That's right -- 700!!!
If you just happened to come to this blog, you should start at the beginning at Lucy's blog -
http://www.love2createitall.com
For those of you following my Artiste 365 Challenge this is my project #4.
I created this cute glass pumpkin to place by our front door during Halloween (ok so maybe he isn't so cute, a little scary haha). He was super easy to put together, all you will need for this project is the following supplies:
- Glass Block
- Orange Vinyl
- String of lights (I chose to put in orange lights that I found at my local craft store)
- Black Tulle
The pumpkin face can be found on page 77 of the Artiste Cricut cartridge. I cut it out on my Gypsy and arranged a square around the face so that it would fit nicely on the block. However, if you do not have a Gypsy you can cut it out as it is, leaving enough space on each side and then with a ruler and craft knife cut the square by hand. It is important for me to mention that if you have never cut vinyl on your cricut before it is a lot different than cutting paper, it's more delicate. The settings you will need to cut the vinyl at are 3-3-3, or medium speed, medium pressure and blade depth 3. This was it will cut the top layer of your vinyl and not the backside and it will not snag your vinyl as easily.
Once the vinyl was cut, I left it on the Cricut mat and peeled off all the parts I didn't want. Basically I peeled out the insides of the eyes, nose and mouth along with the outside of the square. I then took a piece of vinyl transfer tape and applied it over top of the vinyl. I then rubbed on top of the transfer tape so that the vinyl would stick to the transfer tape. Then I slowly peeled up the transfer tape, making sure that the vinyl is lifting up, if there is a spot that isn't you just lay the transfer tape back down and rub that spot again. Finally I centered my vinyl over top of my glass block, laid is down and rubbed it again and slowly peeled off the transfer tape. While there is no wrong way of doing this, I applied my vinyl in a way so that the opening of my glass block was on the bottom. That way the cord for the lights could easily come out.
Once the vinyl was done I took my string of lights and a long piece of black tulle and started randomly stuffing it inside the glass block.
Now you have a beautiful glass block ready to put on display for Halloween :)
If you would like to do this project and do not already have this awesome Artiste Cricut cartridge, you can purchase it on my Close to My Heart website by clicking here.
Also if you purchase anything from my website between now and September 15th, you can choose to purchase this great double stamp set called "It's Your Day" for only $5! That's a savings of $30!!! Be sure to grab this great stamp set while you can before they are all gone.
The next stop on your blog hop fun is Joanne at http://josiesjoy.blogspot.com
Here is the list of all the talented consultants who are participating in this months blog hop:
Thanks so much for stopping by and hopping with us - we hope you LOVE all the projects we created!


